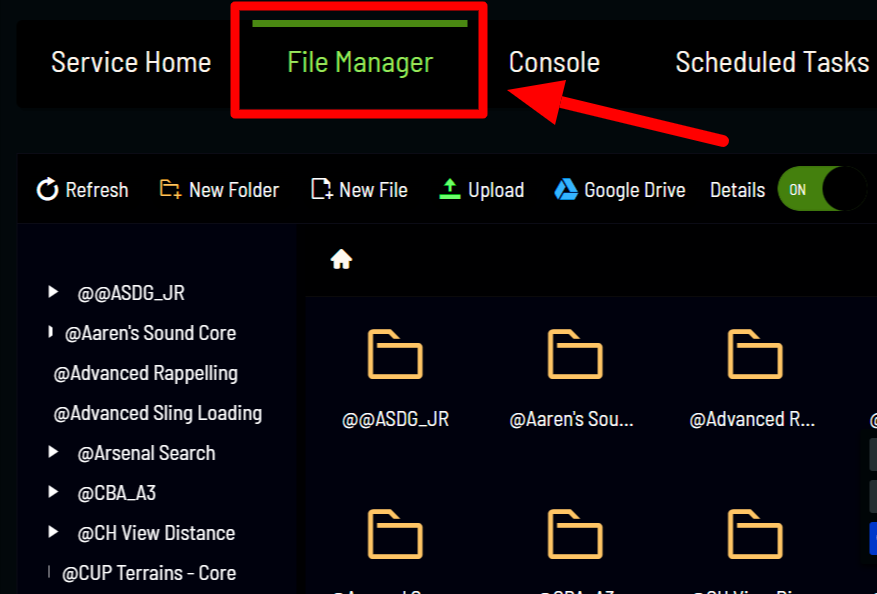
Step 1: Go to your game panel and open your File Manager, where your server files are installed.
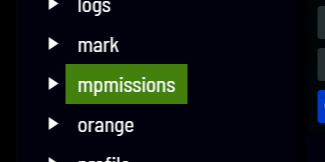
Step 2: Upload the mission PBO file to the MPMissions folder using the upload button from the File Manager.
Note: Make sure that the mission.pbo file name is correct; if it is wrong, it won't likely run properly with the server.
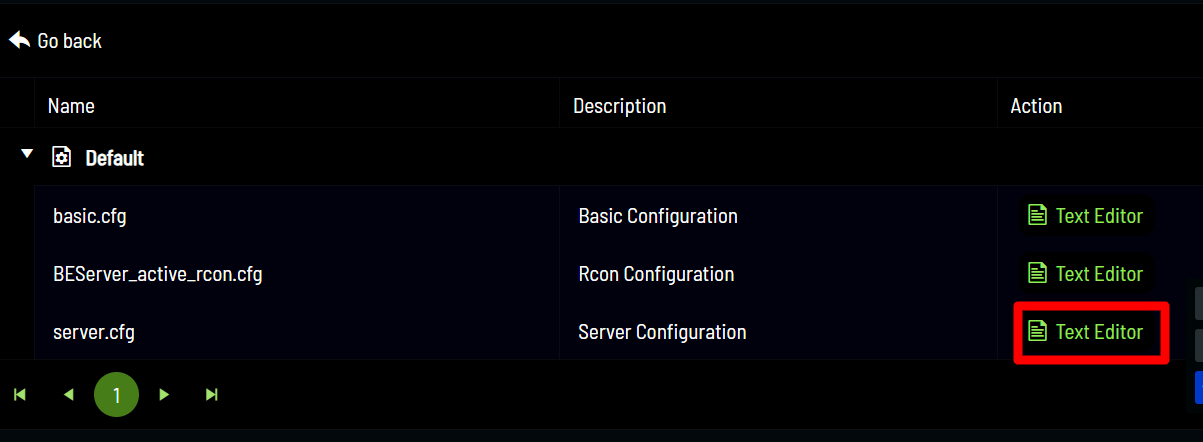
Step 3: Go to the Configuration Files in the game panel
Step 4: Open server.cfg "TEXT EDITOR"
Step 5: Find "class Missions {};" and change it using the following example:
Note: You can add or remove parameters as long as you know the correct parameters.
If the mission file you downloaded was called "BMR_Insurgency_v1_44.Altis" then you would put it in the mission cycle section:
class Missions
{
          class Mission1
         {
              template="BMR_Insurgency_v1_44.Altis";
              difficulty="regular";
          };
};
Note that you do not put ".pbo" at the end of the map template. The ".Altis" at the end of the map name tells the server what map the server is going to use, while the first part is the name of the mission.
If the mission cycle area is left blank, people will be able to vote for a map of their choice on server startup rather than the one you want.
How do I add multiple missions to cycle through?
Simply put, multiple mission classes.
Example:
class Missions
{
	class TestMission01
	{
		template = MP_Marksmen_01.Altis;
		difficulty = "veteran";
		class Params {};
	};
	class TestMission02
	{
		template = MP_End_Game_01.Altis;
		difficulty = "veteran";
		class Params {};
	};
	class TestMission03
	{
		template = MP_End_Game_02.Altis;
		difficulty = "veteran";
		class Params {};
	};
	class TestMission04
	{
		template = MP_End_Game_03.Altis;
		difficulty = "veteran";
		class Params {};
	};
};
