You only need to follow these steps if you want to control where players spawn. There are two approaches: "Forced" and "Custom Choice." I'll explain both.
To control spawning, keep a browser tab open to http://pzmap.crash-override.net. Or use https://map.projectzomboid.com
On the website, click "Lock Coords" and select your desired spawn location. For my example, the coordinates are:
Coords: 10629x9312
Cell: 35x31
Rel: 129x12
Forced Spawn: This option makes all players spawn at the exact location you choose.
- Go to the "Zomboid\Server" directory and open "servertest.ini".
- Find the line "SpawnPoint=0,0,0" and change it to "SpawnPoint=10629,9312,0" (using the coordinates from the website).
- Save the "servertest.ini" file.
Custom Choice Spawn: This option lets players choose from multiple spawn locations when connecting.
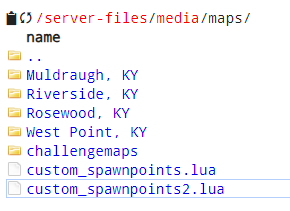
- In the "Zomboid\Server" directory, download "servertest_spawnpoints.lua" to your computer.
- Copy and paste the file, then rename it to "servertest_warehouse.lua".
- Edit "servertest_warehouse.lua" and modify the "worldX", "worldY", "posX", and "posY" values using the "Cell" and "Rel" coordinates from the website. For this example, the line should be:
{ worldX = 35, worldY = 31, posX = 129, posY = 12 }
- Save "servertest_warehouse.lua" and upload it to the "Zomboid\Server" directory on your server.
- Next, edit "servertest_spawnregions.lua".
Look for the line that says, "uncomment the line below to add a custom spawnpoint for this server." To uncomment, remove the two dashes at the beginning of the line, which will enable the Twiggy's Bar spawn point.
- After the Twiggy's Bar line, add the following new line:
{ name = "Muldraugh Large Warehouse", serverfile = "servertest_warehouse.lua" }
- Save "servertest_spawnregions.lua".
-
If you wish to add multiple options, you can create more spawn point files with different names, such as custom2_spawnpoints.lua
Specifying unemployed = will allow any occupation to spawn at the locations. If you wish to add occupation-specific spawn points, you can use code like so:
function SpawnPoints()
return {
  constructionworker = {
    { worldX = 37, worldY = 23, posX = 276, posY = 28, posZ = 0 },
    { worldX = 37, worldY = 23, posX = 216, posY = 12, posZ = 0 },
    { worldX = 37, worldY = 23, posX = 281, posY = 85, posZ = 0 }
  },
  fireofficer = {
    { worldX = 37, worldY = 23, posX = 276, posY = 28, posZ = 0 },
    { worldX = 37, worldY = 23, posX = 269, posY = 28, posZ = 0 },
    { worldX = 37, worldY = 23, posX = 216, posY = 12, posZ = 0 },
    { worldX = 37, worldY = 23, posX = 281, posY = 85, posZ = 0 }
  },
  parkranger = {
    { worldX = 37, worldY = 23, posX = 276, posY = 28, posZ = 0 },
    { worldX = 37, worldY = 23, posX = 216, posY = 12, posZ = 0 },
    { worldX = 37, worldY = 23, posX = 54, posY = 113, posZ = 0 },
    { worldX = 37, worldY = 23, posX = 281, posY = 85, posZ = 0 }
  },
  policeofficer = {
    { worldX = 37, worldY = 23, posX = 276, posY = 28, posZ = 0 },
    { worldX = 37, worldY = 23, posX = 216, posY = 12, posZ = 0 },
    { worldX = 37, worldY = 23, posX = 281, posY = 85, posZ = 0 }
  },
  securityguard = {
    { worldX = 37, worldY = 23, posX = 276, posY = 28, posZ = 0 },
    { worldX = 37, worldY = 23, posX = 216, posY = 12, posZ = 0 },
    { worldX = 37, worldY = 23, posX = 281, posY = 85, posZ = 0 }
  },
  unemployed = {
    { worldX = 37, worldY = 23, posX = 276, posY = 28, posZ = 0 },
    { worldX = 37, worldY = 23, posX = 216, posY = 12, posZ = 0 },
    { worldX = 37, worldY = 23, posX = 281, posY = 85, posZ = 0 }
  }
}
end
